
最最最常用的控件:TextView
1、TextView常用属性:
android:text                设置文本的内容
android:textColor           设置文本的颜色
android:textSize            设置文本的字体大小(一般使用sp)
android:height              设置文本的高度(一般使用dp)
android:width               设置文本的宽度(一般使用dp)
android:inputType           设置文本的类型,默认为普通文本,可选textPassword等类型(通常在EditText中使用)
android:ems                 设置textView的宽度为N个字符的宽度
android:gravity             设置文本框的内容相对于文本框的位置(可以使用多个属性 中间用 “ | ”分割)
android:drawableLeft        用于在文本框左侧绘制图片
android:drawableRight       用于在文本框右侧绘制图片
android:drawableTop         用于在文本框顶部绘制图片
android:drawableBottom      用于在文本框底部绘制图片
android:hint                设置默认显示字体
android:textStyle           设置字形,斜体,粗体等,多个属性用“ | ”隔开
android:ellipsize           设置当文字过长的时候该控件如何显示。
android:maxLength:         限制文本 的长度,超出部分将会不显示
android:lines               设置显示的行数,即使没有数据也会显示
android:singleLine          设置文本是否单行显示
android:clickable           把其属性更改为true,为textView设置事件拦截
2、TextView跑马灯
布局文件中TextView的几个重要属性都要设置
<TextView
        android:layout_width="match_parent"
        android:layout_height="wrap_content"

        android:singleLine="true"

        android:ellipsize="marquee"
        android:marqueeRepeatLimit="marquee_forever"

        android:focusable="true"
        android:focusableInTouchMode="true"

        android:text="测试测试测试测试测试测试测试试测试测试测试测试测试测试试测试测" />
写好上面的布局就可以实现简单的跑马灯,但是实际布局不肯能这么简单,会很复杂有各种控件,TextView可能不只一个还会有EditText占用焦点。跑马灯只有TextView获取焦点的时候才有效果。如果没有获取焦点就像下面的第二行TextView,虽然设置了跑马灯但是并没有效果,只有第一行TextView有焦点,跑马灯有效。
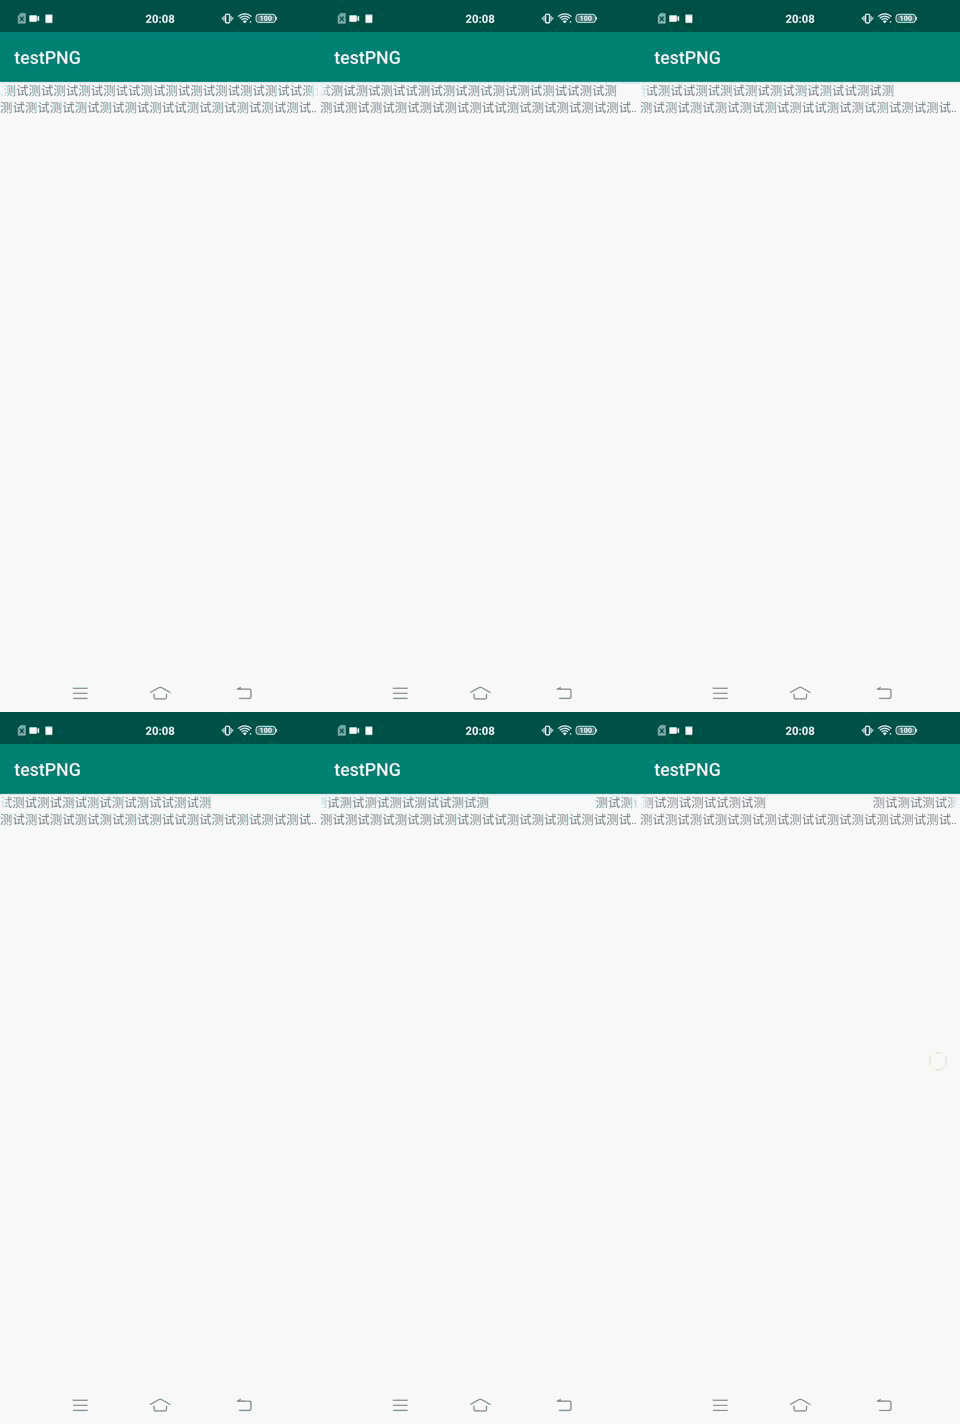
网上都流传的一种方法是继承TextView自定义一个MyTextView,重写isFocused()方法,让其一直返回true;
public class MyTextView extends TextView{
    public MyTextView(Context context) {
        super(context);
    }
    public MyTextView(Context context, @Nullable AttributeSet attrs) {
        super(context, attrs);
    }
    public MyTextView(Context context, @Nullable AttributeSet attrs, int defStyleAttr) {
        super(context, attrs, defStyleAttr);
    }

    @Override
    public boolean isFocused() {
        return true;
    }
}
其实可以直接用代码写下面一句为TextView控件手动设置成选择状态(或得焦点),不需要重写TextView。
textView.setSelected(true);
textView2.setSelected(true);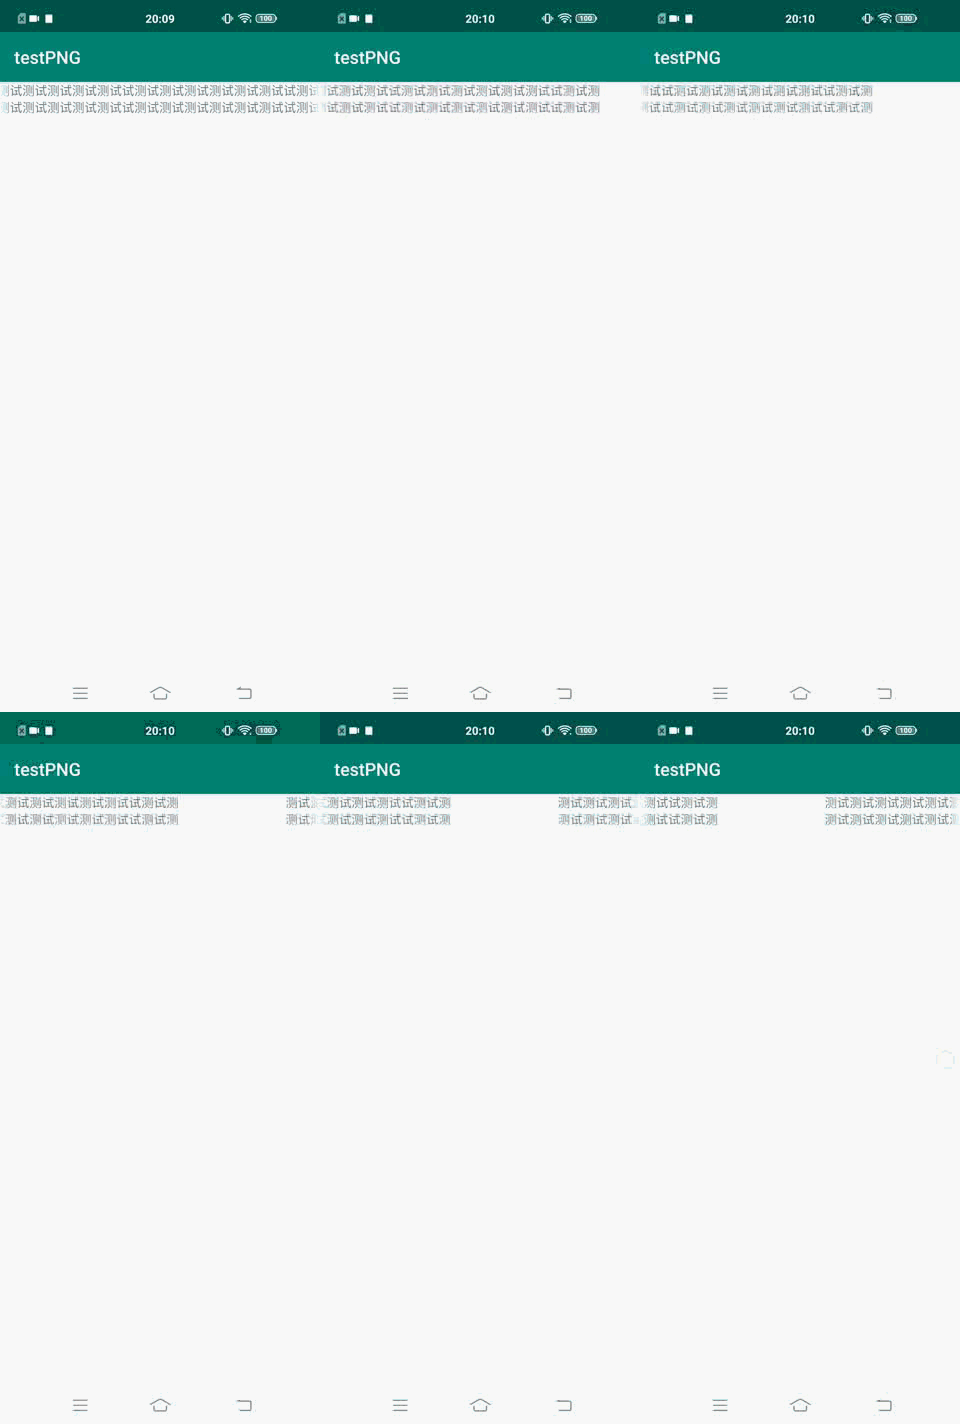
3、自定义TextView设置跑马灯首尾循环间距
TextView没有提供设置相应间距的方法,通过查看源码可以发现,TextView是通过Marquee内部类来实现跑马灯,其中start方法中的局部变量gap通过计算得到,就是跑马灯前后的间距。
private static final class Marquee {
		... ...
        void start(int repeatLimit) {
            if (repeatLimit == 0) {
                stop();
                return;
            }
            mRepeatLimit = repeatLimit;
            final TextView textView = mView.get();
            if (textView != null && textView.mLayout != null) {
                mStatus = MARQUEE_STARTING;
                mScroll = 0.0f;
                final int textWidth = textView.getWidth() - textView.getCompoundPaddingLeft()
                        - textView.getCompoundPaddingRight();
                final float lineWidth = textView.mLayout.getLineWidth(0);
                final float gap = textWidth / 3.0f;
                mGhostStart = lineWidth - textWidth + gap;
                mMaxScroll = mGhostStart + textWidth;
                mGhostOffset = lineWidth + gap;
                mFadeStop = lineWidth + textWidth / 6.0f;
                mMaxFadeScroll = mGhostStart + lineWidth + lineWidth;
                textView.invalidate();
                mChoreographer.postFrameCallback(mStartCallback);
            }
        }
}"gap 没有提供可设置的方法,于是想到反射来改变这个值。但是反射拿不到临时变量。又发现 gap 的值影响到的有四个成员变量mGhostStart、mMaxScroll、mGhostOffset、mMaxFadeScroll,那么反射修改这四个值就可以。
start() 方法最后调了 mChoreographer.postFrameCallback(mStartCallback),之后会走到 tick() 方法,tick() 方法里会调用textView.invalidate() 来进行刷新,跑马灯效果就是通过不断重绘而形成的。
只要重写 invalidate() 方法,在 super.invalidate() 之前反射修改掉四个成员变量的值。"
MarqueeTextView.java 继承TextView重新定义
import android.annotation.SuppressLint;
import android.content.Context;
import android.content.res.TypedArray;
import android.util.AttributeSet;
import android.widget.TextView;
import java.lang.reflect.Field;
/**
 * 跑马灯效果 TextView,可自定义 gap 大小(即滚动时的头尾间距)
 *
 * @author gdeer
 */
@SuppressLint("AppCompatCustomView")
public class MarqueeTextView extends TextView {
    /**
     * 上一次设置的时间,用于过滤多余操作
     */
    private long mLastSetTime;
    /**
     * 自定义 gap
     */
    private float mCustomGap;
    /**
     * 是否使用自定义 gap
     */
    private boolean mUseCustomGap;
    public MarqueeTextView(Context context) {
        this(context, null);
    }
    public MarqueeTextView(Context context, AttributeSet attrs) {
        this(context, attrs, 0);
    }
    public MarqueeTextView(Context context, AttributeSet attrs, int defStyleAttr) {
        super(context, attrs, defStyleAttr);
        TypedArray typedArray = context.obtainStyledAttributes(attrs, R.styleable.MarqueeTextView);
        /*
        这里获取的是像素值而不是dp值,注意,如果布局中没有设置对应的属性,默认值10像素也太小了!!!
         */
        mCustomGap = typedArray.getDimension(R.styleable.MarqueeTextView_MarqueeGap, 10);
        mUseCustomGap = typedArray.getBoolean(R.styleable.MarqueeTextView_useCustomGap, false);
        typedArray.recycle();
    }
    @Override
    public void invalidate() {
        reflectToChangeGap();
        super.invalidate();
    }
    private void reflectToChangeGap() {
        if (!mUseCustomGap) {
            return;
        }
        if (System.currentTimeMillis() - mLastSetTime < 1000) {
            // 1s 内不重新设置,过滤多余操作
            return;
        }
        try {
            Class marqueClass = null;
            Class[] innerClazz = TextView.class.getDeclaredClasses();
            for (Class clazz : innerClazz) {
                if ("Marquee".equals(clazz.getSimpleName())) {
                    marqueClass = clazz;
                }
            }
            if (marqueClass == null) {
                return;
            }
            Field field1 = FieldUtils.getDeclaredField(marqueClass, "mGhostStart", true);
            if (field1 == null) {
                return;
            }
            final int textWidth = getWidth() - getCompoundPaddingLeft() - getCompoundPaddingRight();
            final float lineWidth = getLayout().getLineWidth(0);
            final float gap = mCustomGap;
            float ghostStart = lineWidth - textWidth + gap;
            float maxScroll = ghostStart + textWidth;
            float ghostOffset = lineWidth + gap;
            float maxFadeScroll = ghostStart + lineWidth + lineWidth;
            final Field field = FieldUtils.getDeclaredField(TextView.class, "mMarquee", true);
            if (field != null) {
                Object mMarque = field.get(this);
                if (mMarque != null) {
                    mLastSetTime = System.currentTimeMillis();
                    float mGhostStart = (float) field1.get(mMarque);
                    if (mGhostStart != ghostStart) {
                        // 需要设置的 mGhostStart 与当前 ghostStart 不相等时才去设置
                        Field field2 = FieldUtils.getDeclaredField(marqueClass, "mMaxScroll", true);
                        Field field3 = FieldUtils.getDeclaredField(marqueClass, "mGhostOffset", true);
                        Field field4 = FieldUtils.getDeclaredField(marqueClass, "mMaxFadeScroll", true);
                        if (field2 == null || field3 == null || field4 == null) {
                            return;
                        }
                        field1.set(mMarque, ghostStart);
                        field2.set(mMarque, maxScroll);
                        field3.set(mMarque, ghostOffset);
                        field4.set(mMarque, maxFadeScroll);
                    }
                }
            }
        } catch (Exception e) {
            e.printStackTrace();
        }
    }
}
FieldUtils.java 反射工具类,包含获取TextView、Marquee类中成员变量的方法
import android.text.TextUtils;
import java.lang.reflect.Field;
import java.lang.reflect.Member;
import java.lang.reflect.Modifier;
public class FieldUtils {
    public static Field getDeclaredField(final Class<?> cls, final String fieldName, final boolean forceAccess) {
        if (cls == null || TextUtils.isEmpty(fieldName)) {
            return null;
        }
        try {
            // only consider the specified class by using getDeclaredField()
            final Field field = cls.getDeclaredField(fieldName);
            if (!isAccessible(field)) {
                if (forceAccess) {
                    field.setAccessible(true);
                } else {
                    return null;
                }
            }
            return field;
        } catch (final Exception e) {
            e.printStackTrace();
        }
        return null;
    }
    private static boolean isAccessible(final Member m) {
        return m != null && Modifier.isPublic(m.getModifiers()) && !m.isSynthetic();
    }
}
使用自定义的MarqueeTextView,在布局xml文件中引用,设置两个属性MarqueeGap="大小dp"和useCustomGap="true"
<com.vivo.testpng.MarqueeTextView
            android:layout_width="match_parent"
            android:layout_height="wrap_content"
            android:singleLine="true"

            android:ellipsize="marquee"
            android:marqueeRepeatLimit="marquee_forever"

            android:focusable="true"
            android:focusableInTouchMode="true"

            app:MarqueeGap="200dp"
            app:useCustomGap="true"
android:text="测试测试测试测试测试测试测试试测试测试测试测试测试测试试测试测" />其中的两个自定义属性定义在res/values/attrs.xml中
<?xml version="1.0" encoding="utf-8"?>
<resources>
    <declare-styleable name="MarqueeTextView">
        <attr name="MarqueeGap" format="dimension"/>
        <attr name="useCustomGap" format="boolean"/>
    </declare-styleable>
</resources>在布局中就可以通过app:MarqueeGap使用了,更多关于attrs.xml属性的使用参考另一博客《自定义View四个构造函数、自定义View属性declare-styleable及AttributeSet获取属性值》
相关博客:

评论 (8)
TextView文本可选择
TextView文本可选择设置,android:textIsSelectable=“true”
TextView四周设置Drawable
今天修改一个问题的时候看到了TextView四周可以设置Drawable。这就非常高端了,以前文字旁边需要添加一幅图片,都是ImageView+TextView组合,就很麻烦,布局层级也加深了,显得比较low的方法。
设置的Drawable有要求,必须要设置它的宽高,也就是要调用setBounds(int left, int top, int right, int bottom);其中需要给right和bottom设置固有宽度和固有高度。否则即使设置了Drawable也会遇到不显示的玄虚bug,参考Stack Overflow。
标准设置流程:
或者直接使用下面这个方法,将setBounds()这个方法合并到了setCompoundDrawablesWithIntrinsicBounds()的里边,直接将drawable的宽高自动获取。
TextView文字大小自适应
TextView显示的文字太多,显示不下可以设置超长打点。或者任由TextView随着显示文字多少变化(wrap_content),但是这样UI界面会不可控,可能“变形”。
可以使用下面的一些属性:
android:autoSizeMaxTextSize="20sp"
android:autoSizeMinTextSize="2sp"
android:autoSizeStepGranularity="1dp"
android:autoSizeTextType="uniform"
让文字大小根据文字多少自动适应TextView。
注意:
①一定要指定width和height。
②不能和android:singleLine="true"属性一起使用,否则失效。
推荐博客:
TextView文字自适应
TextView行间距
TextView调整行间距使用linespacingextra和lineSpacingMultiplier 这两个参数。
①lineSpacingMultiplier :值为float,设置行间距倍数
②linespacingextra:值为dimension,行间距距离数值
推荐博客:
Android textview设置字体的行距
Android textview设置行间距及字距
TextView内容滑动
TextView内容很多,滑动阅览往往通过嵌套ScrollView实现滑动,但是这样效率不高。
①其实前面介绍的android:textIsSelectable属性可以让TextView可以滚动。不仅可以是文本可选择。
②TextView的setMovementMethod()
TextView的setMovementMethod()方法,也可以支持对TextView的内容滑动,但对Textview内容不支持长按文字可以复制,搜索等
相关博客:
TextView的textIsSelectable属性和setMovementMethod()
TextView.setText坑
不能直接设置一个整型,虽然意思可能就是为了给TextView设置一个数字
会认为是调用的是setText(int resid)这个方法:
    @android.view.RemotableViewMethod
    public final void setText(@StringRes int resid) {
        setText(getContext().getResources().getText(resid));
        mTextSetFromXmlOrResourceId = true;
        mTextId = resid;
    }
会造成歧义导致异常。
Process: com.easyicon.learnglide, PID: 28383
java.lang.RuntimeException: Unable to start activity ComponentInfo{com.easyicon.learnglide/com.easyicon.learnglide.activity.ViewActivity}:
android.content.res.Resources$NotFoundException: String resource ID #0x0
at android.app.ActivityThread.performLaunchActivity(ActivityThread.java:2520)
... ...
Caused by: android.content.res.Resources$NotFoundException: String resource ID #0x0
所以最好使用String类转换成字符,再设置给TextView:
TextView上下留白如何去掉?
正常设置TextView高度为wrap_content后,上下仔细观察会发现是有一定边距的留白。有时候这个会影响测算设计布局,可以移除掉。给TextView加上下面的属性:
运行对比,明显相同字体大小的文字,在TextView高度设置成wrap_content后计算不一样:
推荐博客:
android:includeFontPadding的使用:清除TextView字体周边空白
Android-解决TextView上下留白问题
TextView阴影效果
没想到TextView还有阴影功能,这个最长用的View真的是把能想到的需求基本上都实现了。在TextView布局中增加下面几个属性:
熟悉Paint的同学会细心的发现,其实上面几个TextView的属性对应Paint的绘制阴影方法setShadowLayer(float radius, float dx, float dy,int shadowColor)中的几个参数,详见自定义View中的神笔:Paint。实现阴影效果:
这几个字段的含义:
①shadowColor :阴影的颜色
②shadowDx :文字阴影的水平偏移,
③shadowDy :文字阴影的垂直偏移
④shadowRadius:文字阴影的模糊半径,值越大阴影文字越模糊
水平/垂直偏移至少设置一个,值可正可负,阴影位置相对如下。shadowColor、shadowRadius缺一个都不能显示阴影。
推荐博客:
Android TextView加上阴影效果